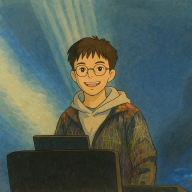
I previously built a SpriteSheet Editor, but after actually using it, the workflow still felt too tedious. I had to talk to ChatGPT one image at a time, wait for each result, go back and forth to revise it, and then do post-processing in the editor. In the AI era, there had to be a smarter way.
Then I saw the underlying SpriteSheet that Codex Pet had generated for me.
That immediately gave me an idea:
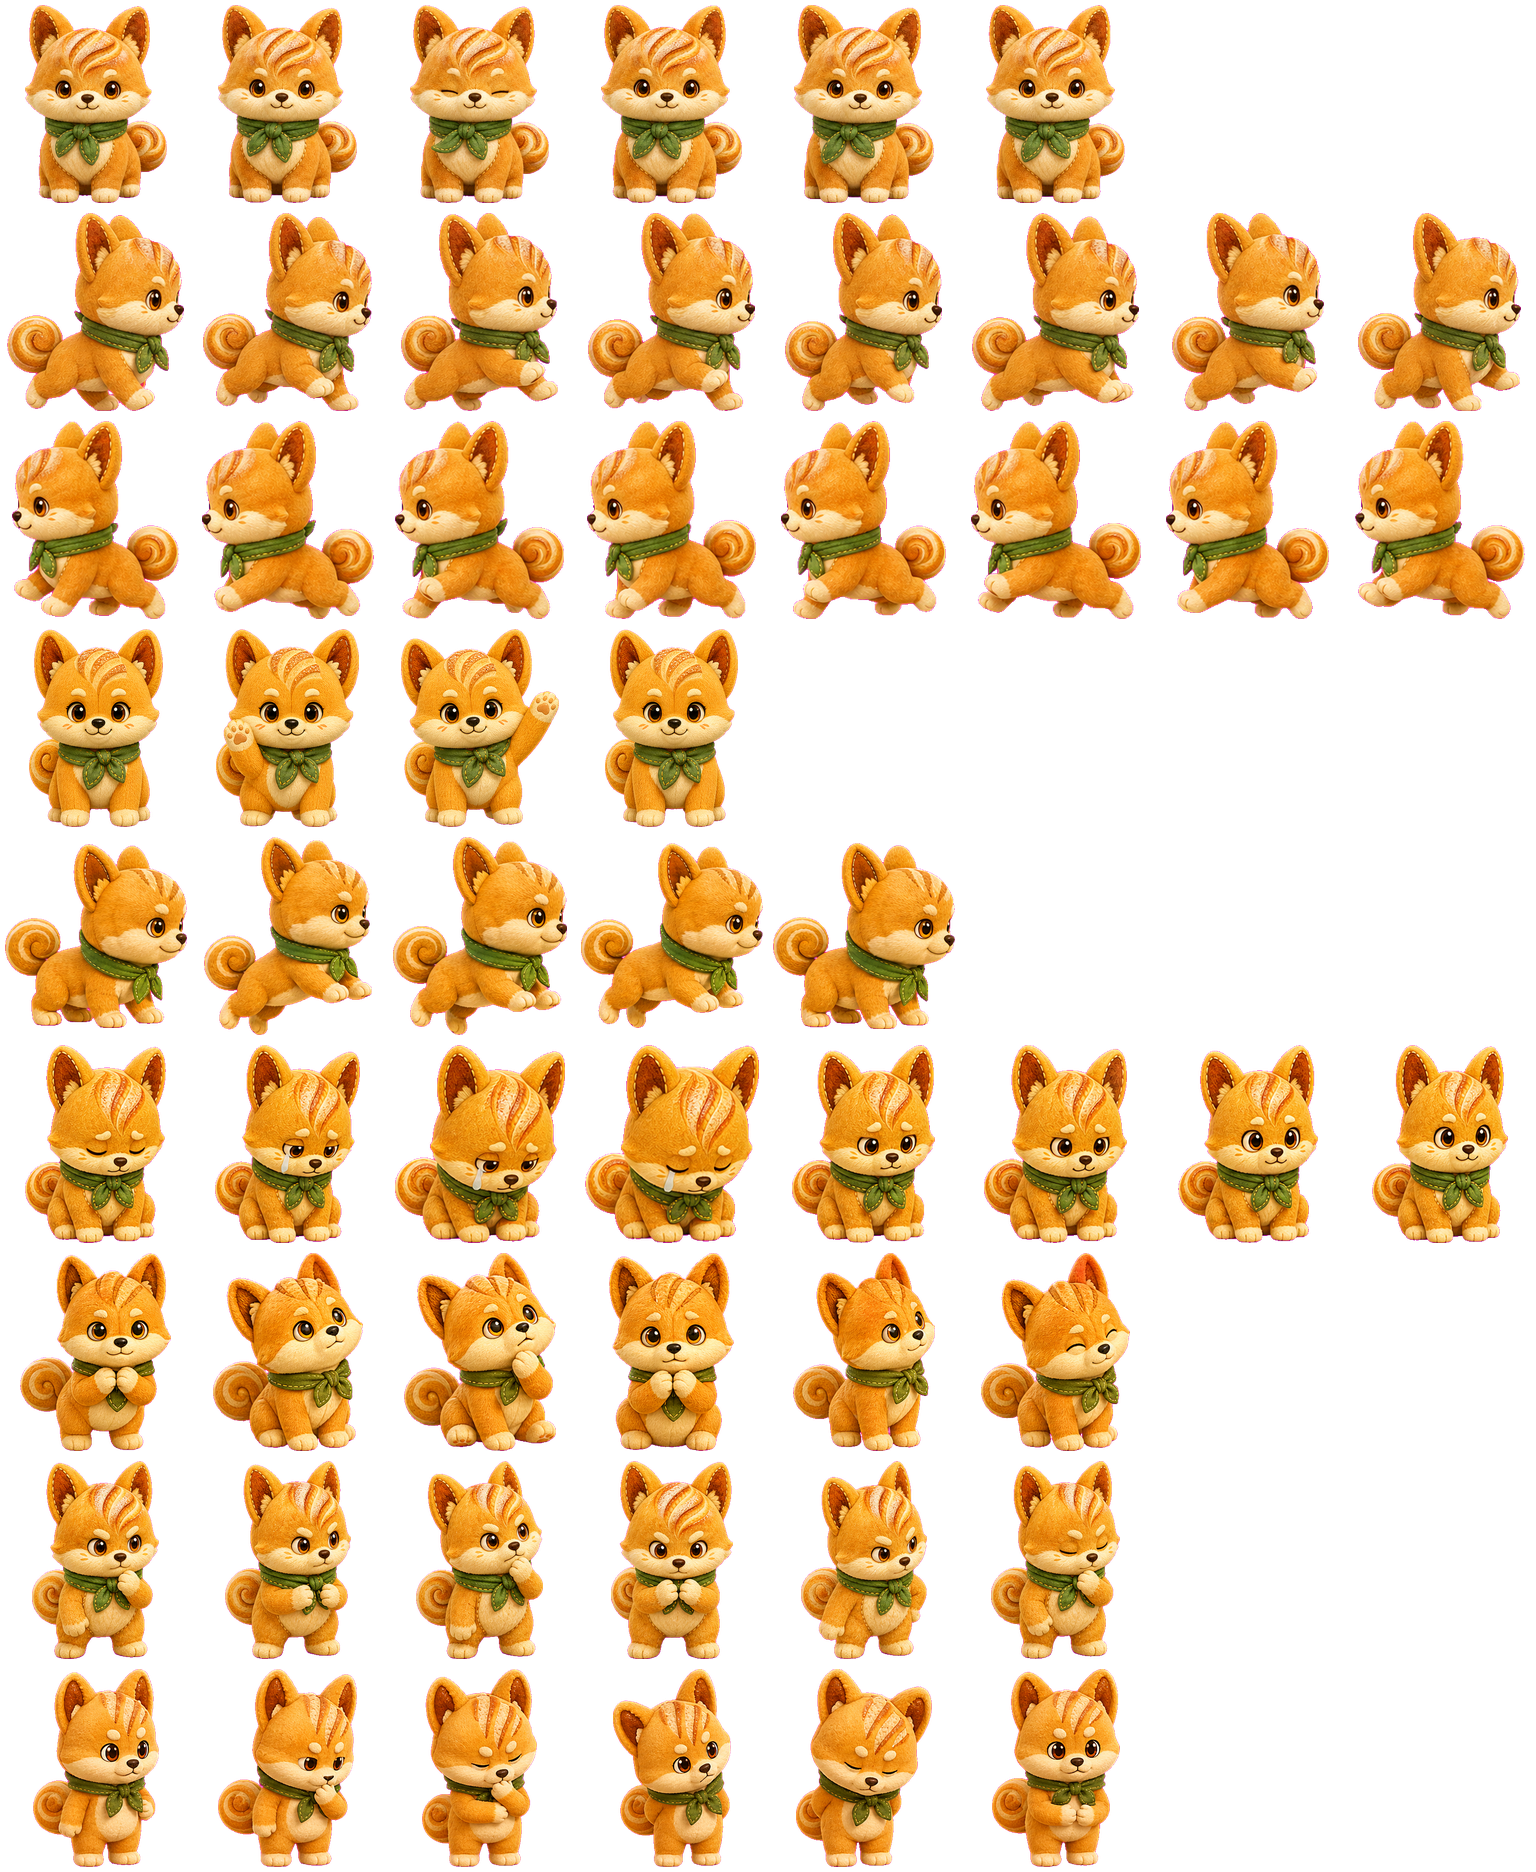
- Codex can generate images.
- Codex can generate images in a standardized format.
Wouldn’t that mean Codex could generate game assets too?
I tried exactly that in a recent game demo. By having Codex reference OpenAI’s Hatch-Pet Skill, it was able to generate the character animations I needed, which made me even more convinced this path could work.
Based on what I had learned so far, I started by building a Game-Tileset-Generator skill specifically for tilesets.
If you want to make something like Stardew Valley, this skill can generate tilesets directly and let you import them into tools like Tiled, greatly reducing the manual cleanup, rearranging, and rework that usually happens after GPT image generation.
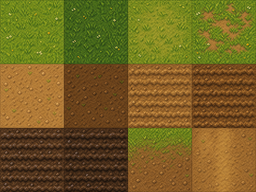
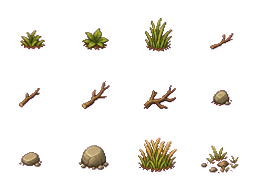
The skill is already open source, Github, and I also put together a simple intro page.
To be honest, it is still far from perfect. The tiles GPT generates are not always exactly what I want. But compared with spending hours hunting for assets or drawing them myself, it is already much more convenient.
In this post, I want to share what inspired me in Hatch-Pet and how the Game-Tileset-Generator skill came together.
Breaking Down the Hatch-Pet Skill #
The goal of Hatch-Pet is to generate pet animations that work with Codex Pet.
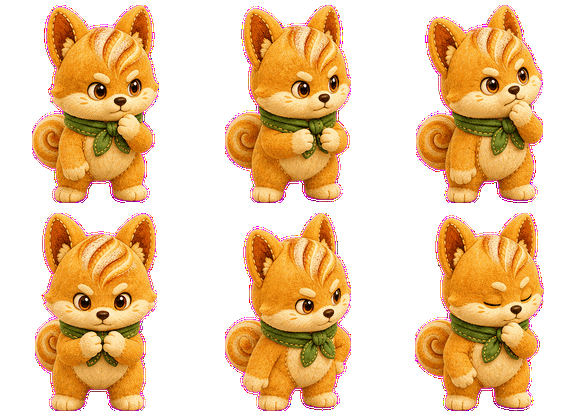
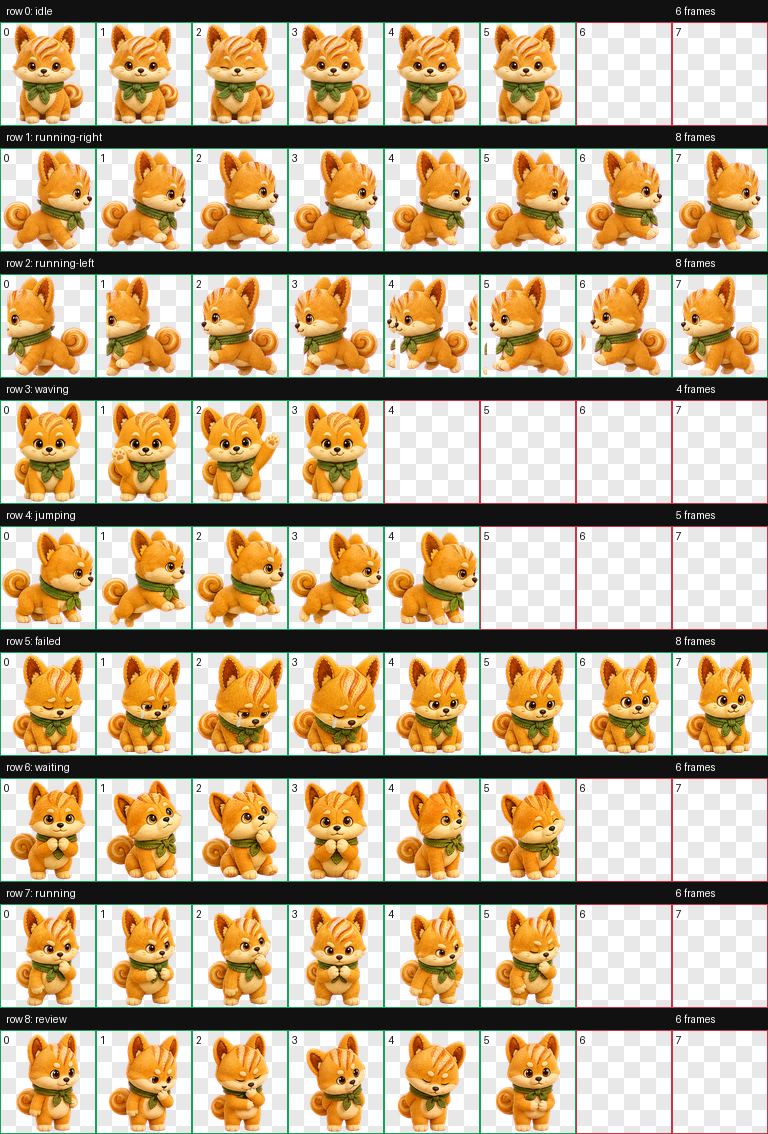
Under the hood, everything is just one SpriteSheet:
- There are nine action groups in total. Besides the
runningaction above, there are alsoidle,running-right,running-left,waving,jumping,failed,waiting, andreview. - The animation frames for each action need to stay as consistent as possible in facial features, proportions, materials, color tone, and accessories.
- Each frame has a fixed size of
192x208pixels. - The background must be cleanly transparent.
With that many actions and constraints, expecting GPT Image to generate everything in one shot from prompts alone is basically unrealistic. Prompt tuning is painful enough on its own, and GPT still cannot control dimensions precisely. That was also the reason I previously built the SpriteSheet Editor.
Hatch-Pet gives up on the fantasy of generating everything in one shot. Instead, it breaks the whole workflow into several steps:
- Generate a base pet character.
- Generate the frame sequence for each action group separately.
- Extract the pet from each action sequence and standardize every frame.
- Stitch all frames into one large sheet.
- Run QA and patch local issues if needed.
There are plenty of details inside that workflow, but I will not unpack everything here. The two parts that inspired me most were:
- how Hatch-Pet standardizes each frame
- how Hatch-Pet structures the workflow
About Standardization #
The most valuable part of the whole skill, to me, is this standardization method.
What “standardization” really means is taking a GPT-generated action sequence like this:
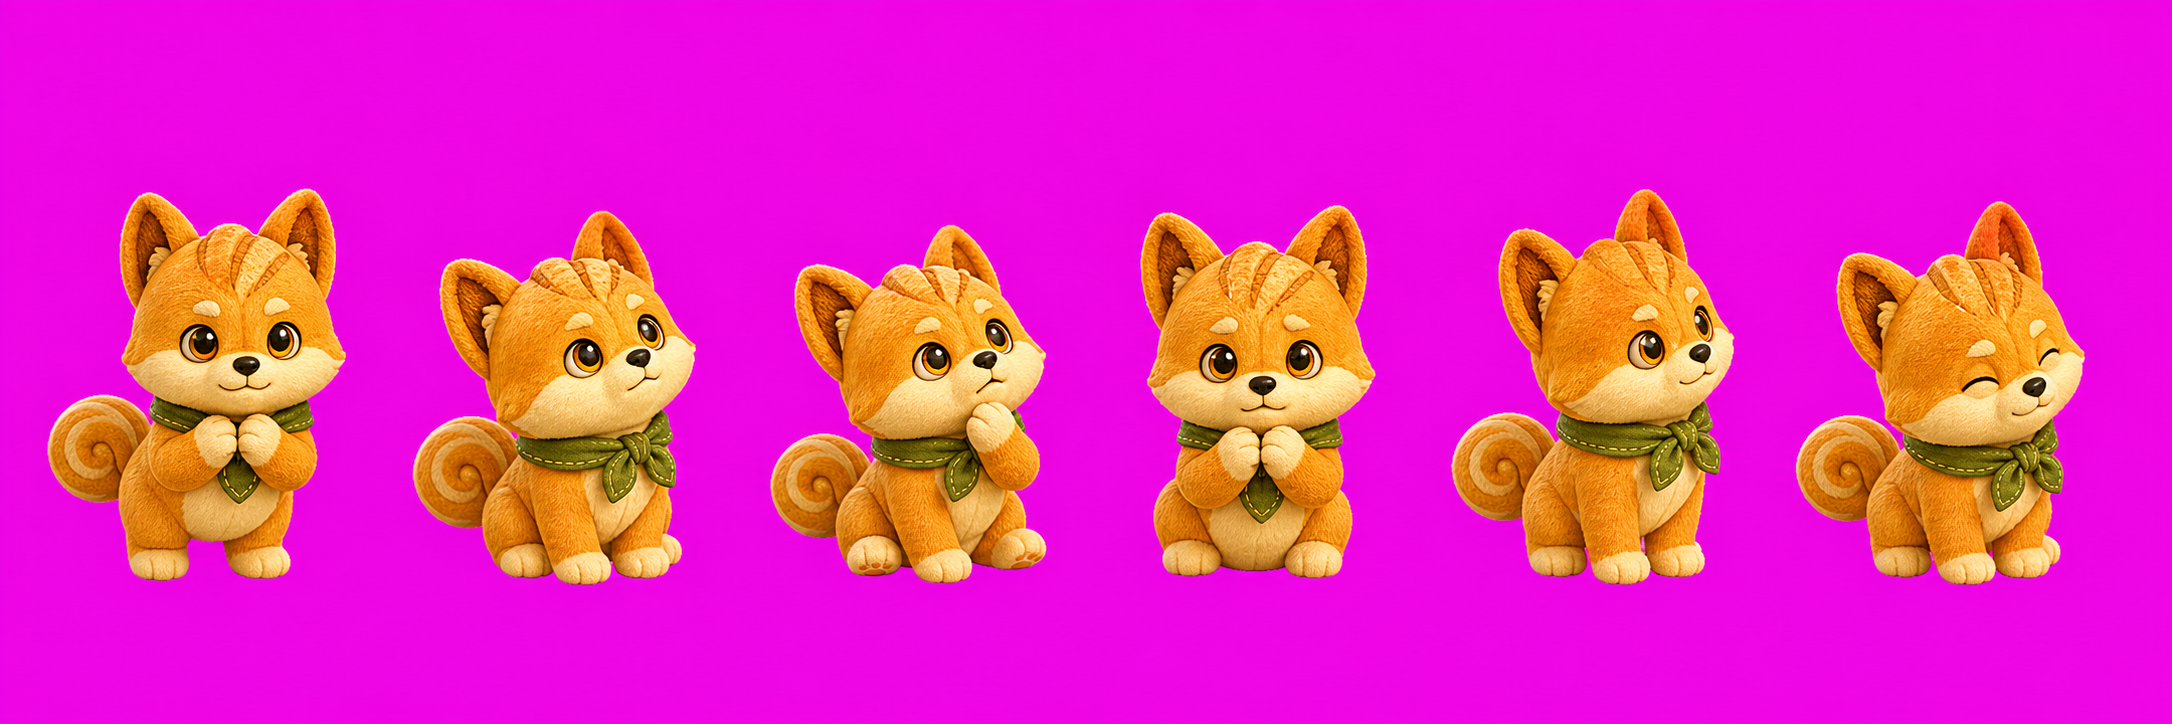
and turning it into something like this, where every frame is 192x208 pixels with a fully transparent background:

The core ideas are:
- layout guidance
- transparency processing
- subject extraction
1. Layout Guidance #
When Hatch-Pet generates each action group, it does not just provide an action prompt and the base character image. It also provides a layout guide image as reference.

Compared with an abstract text description, a layout guide makes it much easier for the model to understand how many frames belong in a sequence, how they should be arranged, and how each pose should sit inside its intended cell at a consistent size.
2. Transparency Processing #
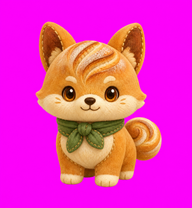
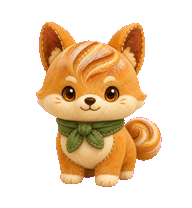
Right now GPT cannot directly generate images with transparent backgrounds, and framed action images with solid backgrounds cannot be used in Codex Pet. So the background has to be converted to transparency in code by turning those pixels into RGBA(0,0,0,0). RGB represents a pixel’s color, while the A in RGBA is the alpha channel, which controls transparency.
The core idea is basically the same as a green screen, or chroma key, in visual effects. You pick a background color that will not collide with the subject. Here the chosen color is purple / magenta: #FF00FF.
To make transparency processing easier, the prompt also includes specific constraints: every pixel must either belong to the pet or belong to removable chroma-key background, and the pet’s colors must not get too close to the chroma-key color.
The code cannot simply remove every pixel equal to #FF00FF, because if you inspect GPT-generated images with a color picker, you will always find color variation. So the code also needs to calculate the RGB distance between each pixel and the chroma-key color, then remove pixels that fall within a threshold range.
3. Character Extraction #
Beyond RGBA issues, GPT still cannot control dimensions precisely. For example, the waiting action needs 6 frames, and each frame is 192x208, so the target size should be 1152x208.
But even with a layout guide at that size, the generated image still came out as 2172x724, which does not match the target. So the character has to be extracted, and each frame then has to be scaled into 192x208.
There are three extraction methods:
- Slots: split the image into equal-width cells directly
For example, the waiting sequence has 6 frames in a 2172x724 image:
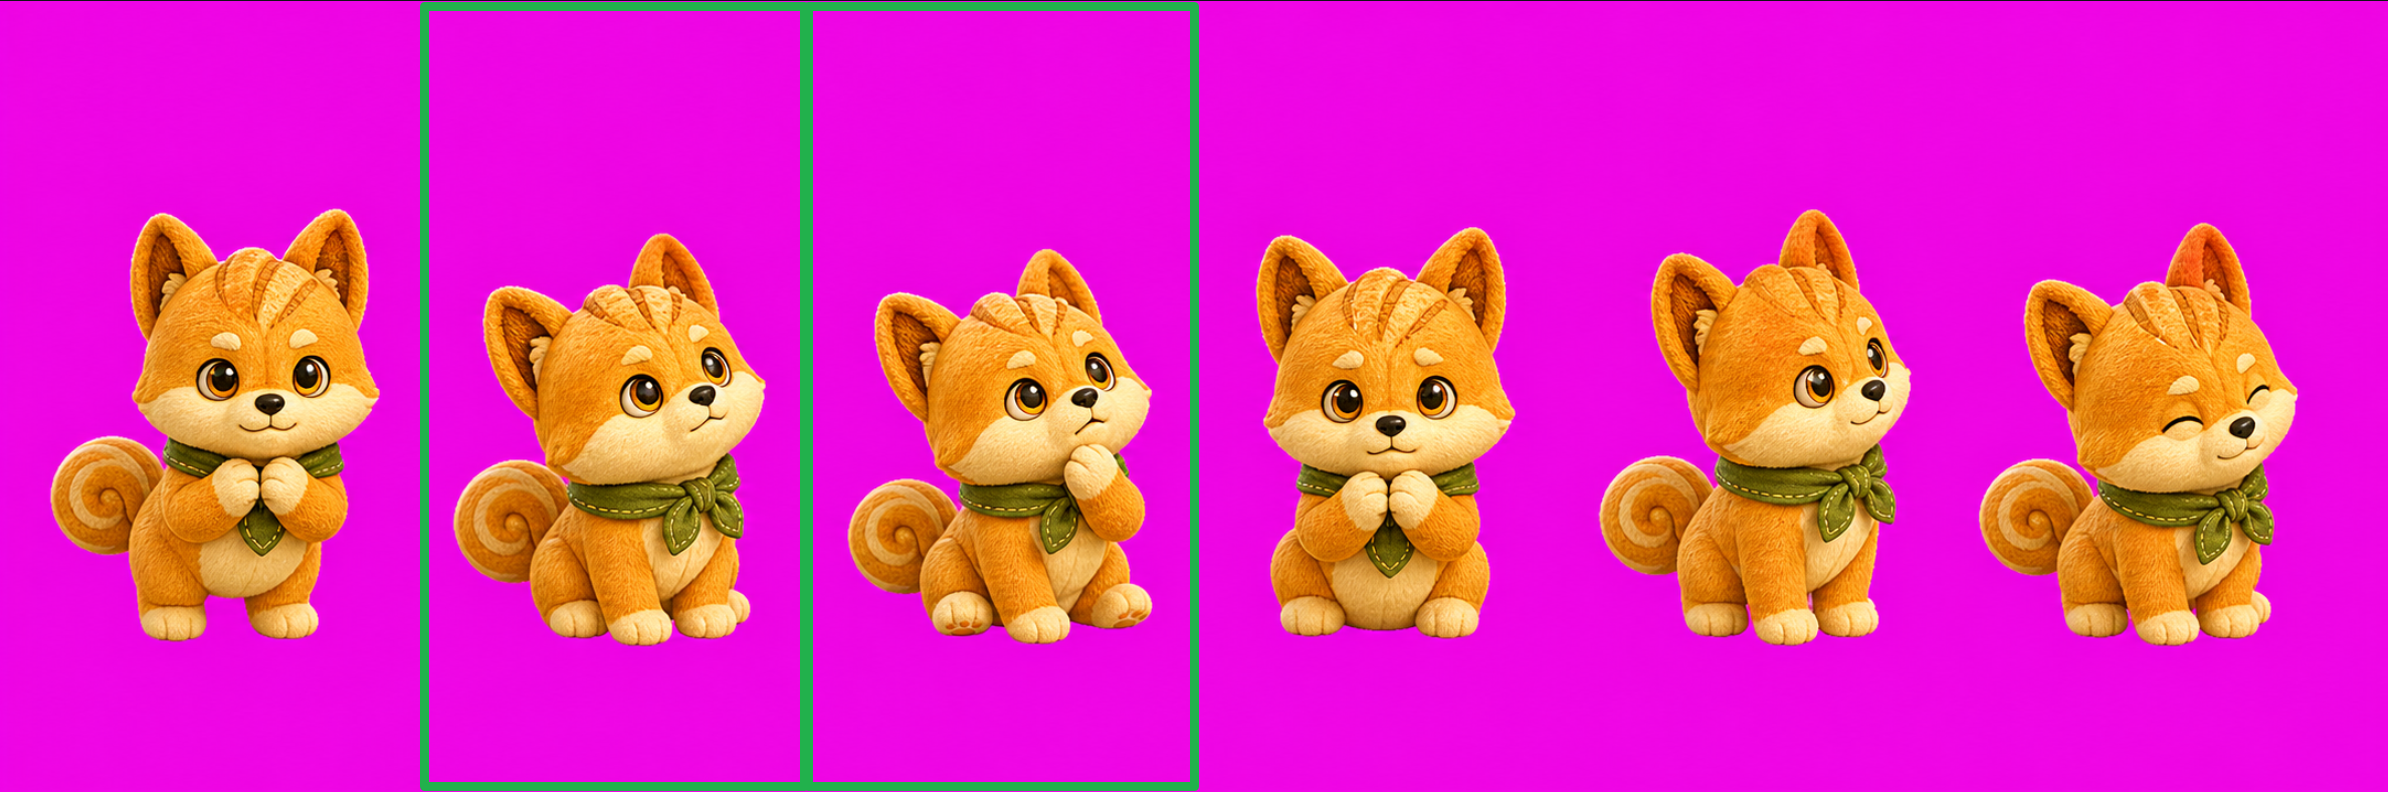
- Split the width evenly:
2172 / 6 = 362, so each frame becomes362x724 - Compare the aspect ratio to
192x208and calculate the scale factor withmin(192/362,208/724)=0.2873 - Scale proportionally to get
104x208 - Center the result and fill the missing width with transparent pixels
This method is especially useful when GPT follows the layout guide closely. It is simple and stable.
But if GPT shifts the poses even slightly, the resulting animation will shift during playback as well.
- Components: extract non-transparent connected subjects
This method builds on the transparency step above. Once the background becomes fully transparent, the remaining connected pixels form the character subject. You can wrap each connected subject using a bounding box defined by its top, bottom, left, and right edges, and then scale that bounding box proportionally into a 192x208 cell.
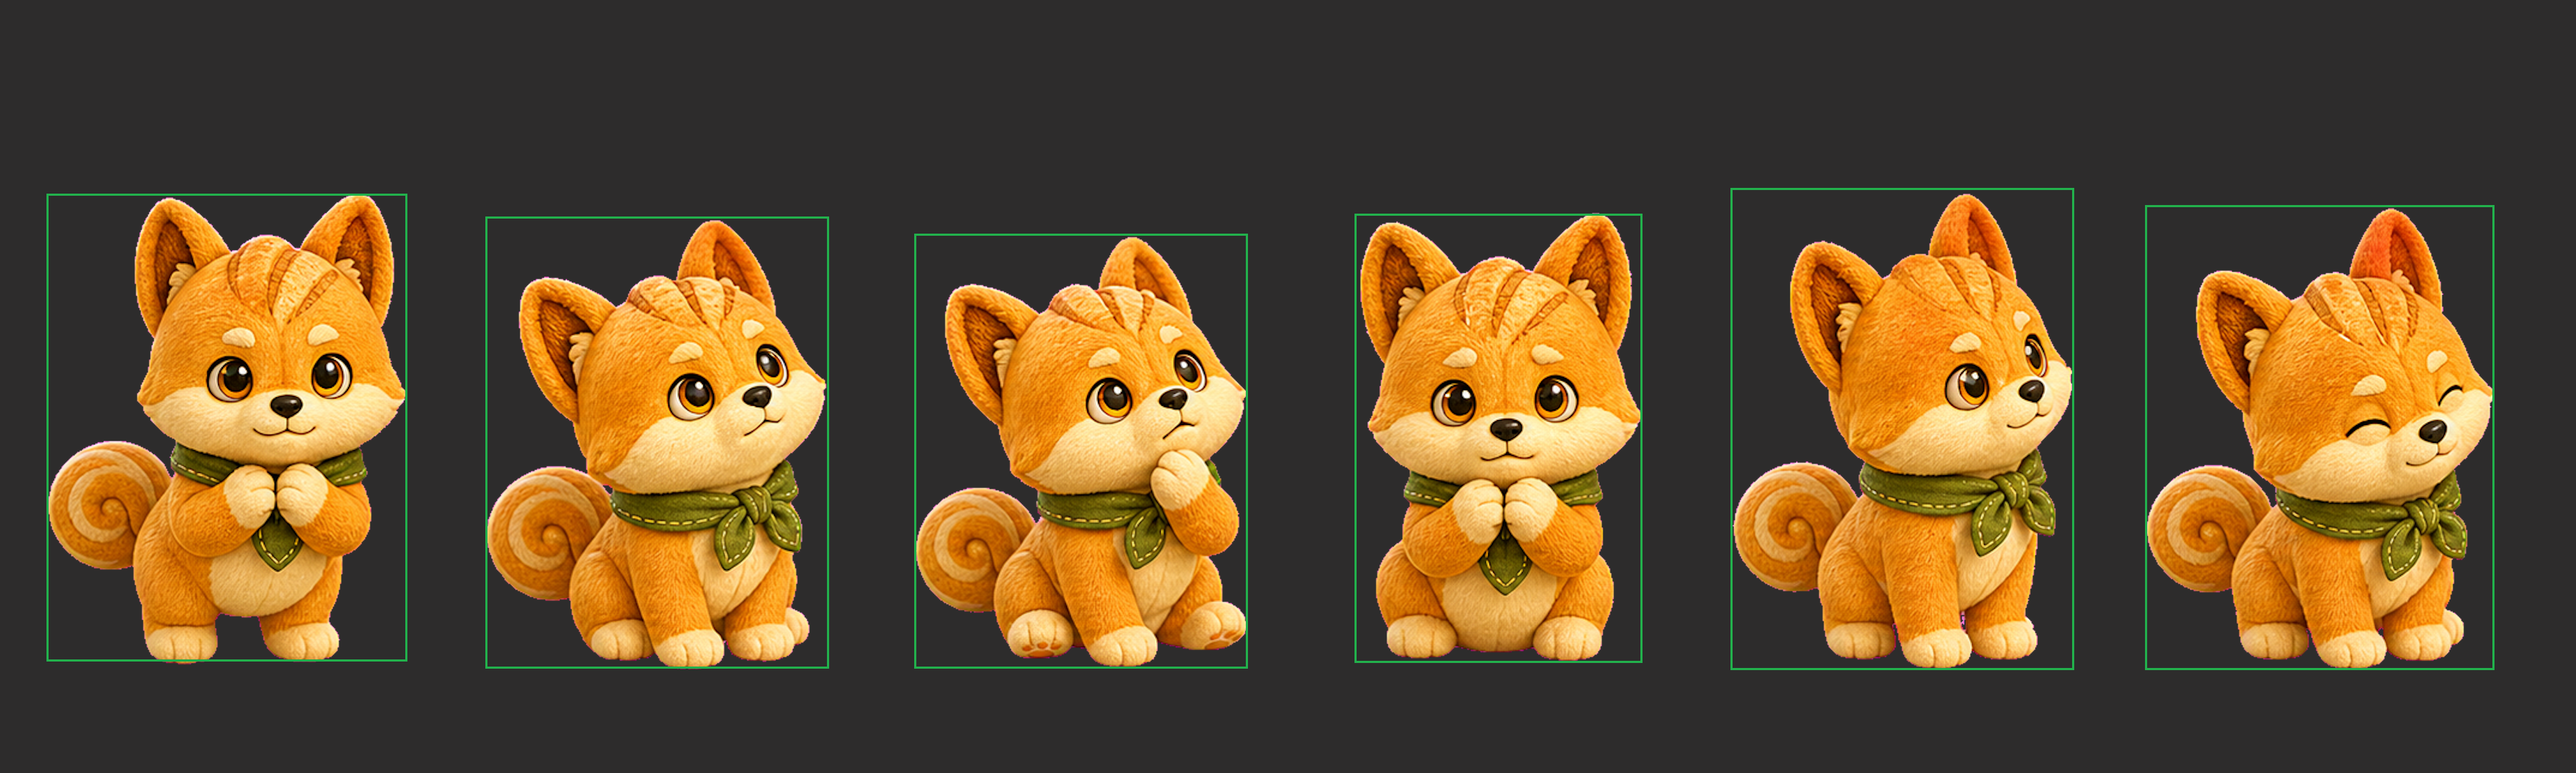
This works especially well for irregular GPT outputs.
But if some pixels remain after transparency processing, they become visual noise, so you also need an area threshold to filter out those tiny leftovers.
However, if the pet has an effect element, such as a thinking bubble floating on the right, the bounding box for that frame becomes different. Since this method scales each bounding box independently, different bounding-box sizes lead to different pet sizes after scaling into 192x208, and the animation starts popping larger and smaller between frames.
To avoid that, Hatch-Pet explicitly constrains transparency and effects: do not add shadows, floating props, or decorative elements that are detached from the pet body or unrelated to the action itself.
This method works best for actions with relatively small bounding-box variation, such as subtle waving, breathing, or blinking.
But for larger motions, the bounding boxes can vary a lot, and for jumping actions, this bottom-aligned extraction also fails to preserve the sense of vertical movement.
- Stable-Slots: use a unified viewport
This is an improvement over the Components method. If independently scaled bounding boxes cause size jumps and jitter, then use one consistent viewport for the whole action sequence, extract the subject through that window, and then scale into 192x208.
For example, consider a jump sequence:
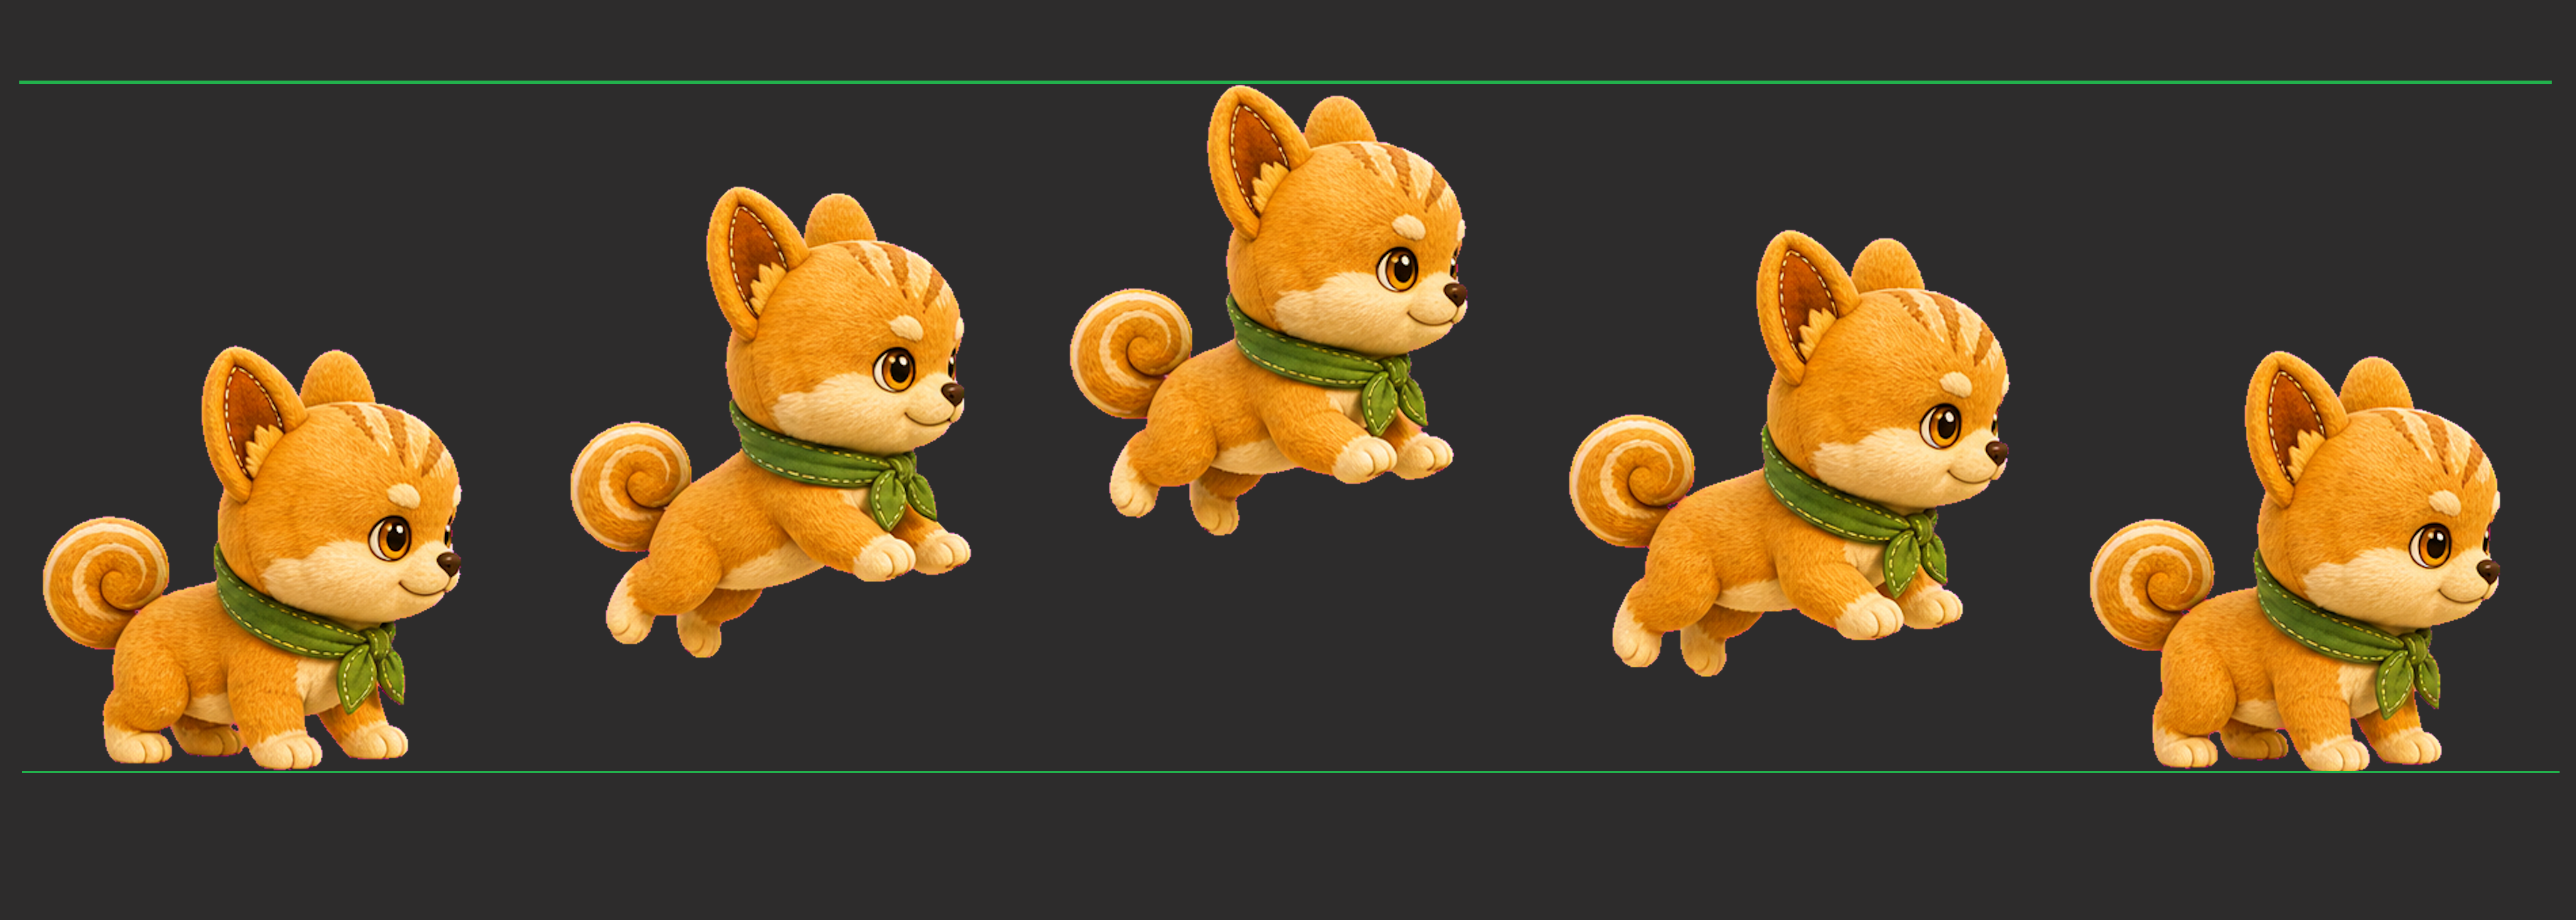
- Find the highest and lowest points across all bounding boxes to get a height that can contain the entire sequence
- Compare the widths of all bounding boxes and take the maximum width
- Add some transparent padding around the result to form one unified window
This method preserves the relative movement between frames as much as possible. But because the window includes more blank space, the pet may end up slightly smaller after proportional scaling than in other actions.
About Workflow Design #
Workflow design is basically about connecting the standardization pipeline into one coherent flow. But beyond the process itself, three things matter most:
- target
- division of labor
- validation
1. Define a Concrete Target Spec #
Only with a clear and explicit target spec can the output be measured and programmatically validated.
Hatch-Pet defines the target spec from the very beginning through scripts:
- What should the final image size be?
1536x1872, with a192x208cell size and a total grid of8x9 - Which action belongs on which row, how many frames it needs, what its width and height should be, and how much safe margin is required. For example, row 7 is
waiting, it needs 6 frames, each cell is192x208, so the row is1152x208, and it also needs an 18px horizontal and 16px vertical safe margin
2. Clear Worker Roles #
Context affects how an agent makes decisions. If a single agent does everything and carries all the context, later decisions can easily get polluted by earlier information.
Hatch-Pet uses a multi-agent design with these roles:
| Role | Responsibility |
|---|---|
| Parent Agent | Infer the pet identity, define the target, assign work to other workers, schedule tasks and track progress, and run post-processing scripts and fixes |
| Base Worker | Generate only the base character |
| Row Worker | Each Row Worker generates only one action group |
| Visual QA Worker | Evaluate each action GIF and the final combined contact sheet against the target |
Each role gets its own specific task and context.
3. Validation and Repair #
Every intermediate output in Hatch-Pet goes through its own QA checks.
- After standardizing one action group, code checks the frame count, size, transparent edges (safe margins), background residue, whether pixel area stays inside a safe range, and so on
- After the full sheet is assembled, it checks dimensions, transparency, and other properties again
But code can only understand pixels. It cannot judge whether the image itself is visually reasonable. So Hatch-Pet also generates GIF previews and a contact sheet for visual QA by a large model. If problems show up, it tries to repair them by either regenerating the action group or re-running standardization.
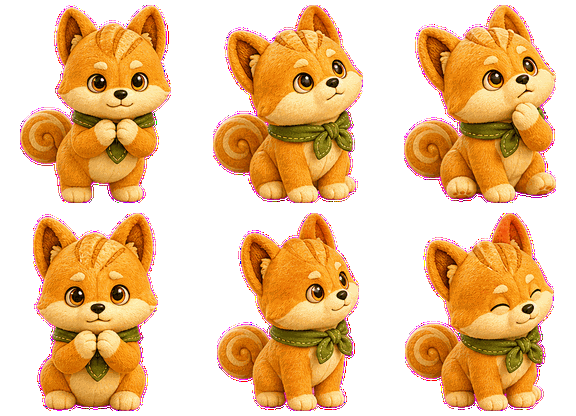
Even so, Hatch-Pet can only do its best to satisfy the requirements. In the end, a human still needs to decide whether the result is actually good enough.
What I Learned While Making Game-Tileset-Generator #
Once I understood Hatch-Pet’s standardization flow, it became obvious that the same general approach could be combined with GPT image generation and applied to many other image-processing workflows.
More than the technical details, what I really want to share are a few lessons outside the technical side.
How the Skill Evolved #
1. From Broad Ambition to Focus #
After seeing Hatch-Pet work inside a game demo, my first instinct was to build a general-purpose game asset generation skill. After all, the standardization pipeline looked broadly similar: users describe the assets they want, and the model generates them through a standardized processing flow.
So I had Codex try to build that skill by referencing Hatch-Pet.
It did not work.
- Trying to use one method for every asset type
Game assets are too diverse. There are character animations, tilesets, props, and more. Different asset types have completely different goals and constraints, so their prompts and standardization methods also need to be specialized. But the “general game asset generation skill” Codex produced was trying to solve every scenario with one generic pattern.
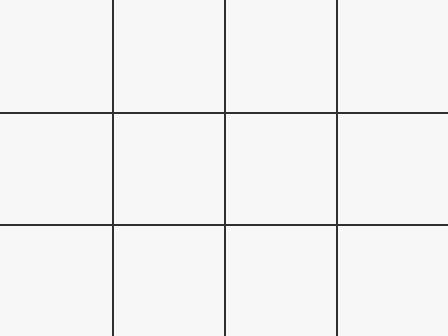
Take terrain tiles as an example. If you apply the character-animation approach, use a layout guide with safe margins, extract non-transparent subjects via components, and then stitch them back together, you quickly end up with jagged transparent edges around every terrain tile.
What terrain tiles really need is a layout guide without safe margins plus a slots-based equal split.
- The limitation of character animation generation
Right now, GPT-generated motion sequences still have a hard limitation: leg motion between frames is often inconsistent. I tried a lot of prompting strategies. I even borrowed the layout-guide idea and used GPT to generate a motion skeleton image as reference. Still, I could not get a satisfying animation sequence.
So the conclusion was simple:
If you try to do too much at once, every scenario ends up handled badly. Different asset types need different skills. And if a character-animation skill cannot solve the core motion problem, then compared with Hatch-Pet it does not really add much. So I narrowed the scope and focused only on a tileset-generation skill.
2. From Beginner to “Proficient” #
Before building this skill, I had basically no experience in image processing or game development. My only related experience was casually exploring how to build games with Codex in my spare time, mostly by tossing it game ideas without worrying too much about implementation.
So when I first used Codex to write a tileset-generation skill, I was really just an outsider trying to direct an expert. The only things I could do were:
- give it a one-line request: “reference Hatch-Pet and write a tileset-generation skill”
- when I found problems, say things like: “look at Hatch-Pet and fix this part” or “figure out a better way for that part”
One of the pleasures of vibecoding is that the demo often exists before the requirements are even fully clear. One of the pains is that even after many rounds of letting it debug itself, the problems still remain. That gets frustrating fast.
And if you open SKILL.md, you can immediately see how many phrases inside it exist only to patch specific problems. Calling it a messy document would be fair. Messy code is sometimes tolerable if you do not need to look at it and the business logic still works. But a messy skill prompt is different. You have no idea which phrase will later show up in context and start affecting the model’s behavior.
That is what led to the Hatch-Pet analysis earlier in this post. Without understanding how Hatch-Pet actually works, and without learning at least some basic image-processing concepts, it would have been very hard to build this skill.
Thankfully, AI also changes how quickly you can learn. I did not need to finish a whole beginner curriculum first. Whenever I ran into a problem during the build, I could just ask Codex and learn while making.
At the same time, to avoid losing control, SKILL.md also needed staged human review: first confirm the structure, then let Codex fill it in section by section.
A Guided Flow for Clarifying Requirements #
Most frustrating rework in agent collaboration comes from one thing: the requirements were never clearly defined in the first place.
Hatch-Pet has a very clear job. It creates SpriteSheets that can be used in Codex Pet. The user only needs to describe what kind of pet they want. The rest of the target specification is already defined inside the skill.
Tilesets are different. Different game types need different tile sizes. Some need 32x32, some need 64x64. Some need terrain, some need placeable props. The view might be top-down or side-view. A professional game developer might be able to describe everything in one go, but they would probably still miss details. Most of the time, user requests are inherently fuzzy. For beginners, they may not even know how to phrase what they want.
Without a clear target spec, a skill can hardly produce the result you expect.
So at the start of the workflow, the agent first translates the user’s request into the spec format supported by the skill, then proposes a recommendation that fits the request and asks the user to confirm it. For example:
Help me generate 12 ground materials for a Stardew Valley style game: grass, dirt, tilled soil, and so on.
The skill would respond with something like this:
Recommended spec:
tile sizeRecommend64x64Reason: your previous two sets already use64x64, so keeping the same size makes later mixing much easier. If you want something closer to the original game’s density,32x32is also possible, but you will lose some detail.
pixel styleRecommendfullReason: grass, dirt, and tilled soil are full-tile surface materials and should fill the entire tile.
viewRecommendtop-downReason: that matches the way Stardew-style farm ground is visually read.
object layout sizeRecommend all1x1Reason: 12 single-tile ground variations are the easiest format for map editing and random mixing.
atlas contentRecommendterrainI suggest these 12 terrain tiles:
grass_light: light grassgrass_dark: dark grassgrass_worn: lightly worn grassgrass_patchy: patchy grasssoil_plain_light: light bare soilsoil_plain_dark: dark bare soilsoil_hoed_dry_a: tilled dry soil Asoil_hoed_dry_b: tilled dry soil Bsoil_hoed_watered_a: tilled wet soil Asoil_hoed_watered_b: tilled wet soil Bfield_transition_soft: soft grass-to-soil transition tilefield_path_worn: worn path tile for field crossingsThis set covers grass, soil, tilled land, and transition pieces, enough to build a basic farm ground layer.
repeatabilityRecommendbothReason: terrain like this should tile seamlessly both horizontally and vertically.atlas layout Recommend
4 columns x 3 rowsReason: that fits exactly 12 tiles.run directory Suggest:
[project path]/game-tileset-generator/stardew-ground-mix-64If this version looks good, just reply:
Generate with this specIf you want changes, just say what to adjust, for example:
Change it to 32x32Remove the path and replace it with more grass variationsUse a lower-saturation palette closer to the original game
The user can keep iterating until the spec is confirmed. Once that spec is locked in, the rest becomes much easier, because the workflow can route the request into a known processing path.
Final Thoughts #
I have run this skill several times now, and it has been fairly stable, so I decided to release it in its current form. It is already open source, Github.
If you are making a game, have looked everywhere for the tileset assets you want, still cannot find them, and are not going to draw them yourself, this skill might be worth trying. Feedback is very welcome.